Analog Input
- ทำอะไร
- ทำ ทำไม
- อุปกรณ์ที่ใช้
 |
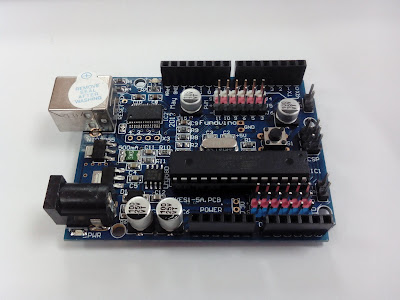
| Arduino Duemilanove Extended |
 |
| ตัวต้านทานปรับค่าได้ (5K) |
 |
| ET-TEST 10PIN/OUT (LED) |
 |
| Bread Board |
- ขั้นตอนการทำ
- เขียนโปรแกรม Arduino โดยเมื่อหมุนตัวต้านทานปรับค่าได้ทวนเข็มนาฬิกาให้ไฟ LED กระพริบช้าและเมื่อหมุนตัวต้านทานปรับค่าได้ตามเข็มนาฬิกาให้ไฟ LED กระพริบเร็ว
- เชื่อมบอร์ดกับคอมพิวเตอร์และโหลดโปรแกรมที่เขียนเสร็จแล้วลงบอร์ด Arduino
- ใช้ digital PIN2 ต่อกับ LED หลอดใดก็ได้
- จ่ายไฟ 5V จากบอร์ด Arduino ให้กับ LED
- สังเกตผลจากเมื่อหมุนตัวต้านทานปรับค่าได้ทวนเข็มนาฬิกา LED จะต้องกระพริบช้าลง
- ผลการทำงาน
- แบบทดสอบ Analog Input
- Source Code
ReadAnalogVoltage
Reads an analog input on pin 0, converts it to voltage, and prints the result to the serial monitor.
Graphical representation is available using serial plotter (Tools > Serial Plotter menu)
Attach the center pin of a potentiometer to pin A0, and the outside pins to +5V and ground.
This example code is in the public domain.
*/
// the setup routine runs once when you press reset:
void setup() {
// initialize serial communication at 9600 bits per second:
Serial.begin(9600);
}
// the loop routine runs over and over again forever:
void loop() {
// read the input on analog pin 0:
int sensorValue = analogRead(A0);
// Convert the analog reading (which goes from 0 - 1023) to a voltage (0 - 5V):
float voltage = sensorValue * (5.0 / 1023.0);
float resis = (voltage * 100);
int resistance = resis;
// print out the value you read:
Serial.print("R: ");
Serial.print(resistance);
Serial.print(" vol: ");
Serial.println(voltage);
digitalWrite(1 , HIGH);
delay(resistance);
digitalWrite(1 , LOW);
delay(resistance);
}
ไม่มีความคิดเห็น:
แสดงความคิดเห็น